How to setup Payroll Exports in the CS TimeClock Web Interface
Payroll balancing is available from firmware version 1.19f.
Payroll Exports are configured under Setup Menu, Payroll Exports option as this allows you to setup different Payroll Export Names and assign employees to that Payroll Export. If you need to export hours to more than one payroll package you can do this by adding a Payroll Export for each export you need. Then assign an employee to the applicable Payroll Extract.
Let’s use an example:
The CS TimeClock supports various payroll exports. If a company uses 2 of these for different purposes then setup a Payroll Export for each of the packages, e.g. Wage Easy and VIP. Then add all employees to either one of these Payroll Exports. One could also use the same accounting package, but have 2 Payroll Exports to group 2 or more groups of employees.
Step 1: Add a payroll export
Log in to the CS TimeClock web interface as an administrator. Click on Payroll Exports in your Setup Menu.

Click on the Insert button.
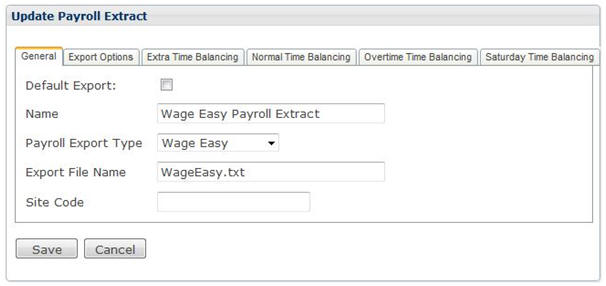
Give the Payroll export a descriptive name. Let us call our example export Wage Easy Payroll Extract.
If you are exporting to payroll, select the payroll type, enter the Export File Name and the Site Code where applicable. Select the time categories you want exported under the Export Options tab.
If the payroll you are using does not appear in this list, please send us the payroll extract layout information. If you are not exporting to payroll, you can select any type and leave the rest of the fields blank.
Step 2: Assigning the payroll export to your
employees
Click on Employees under the Browse menu.

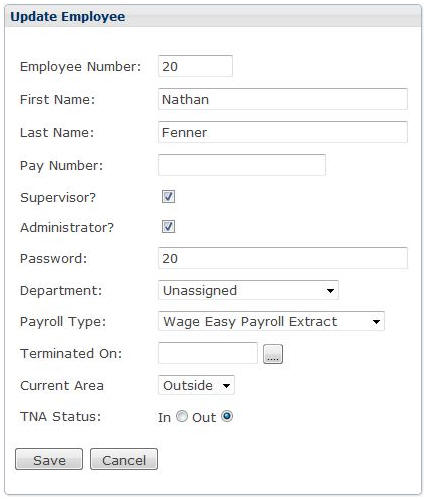
Step 2: Exporting payroll hours
Select Payroll Export under the Browse menu.

Select the correct From and To date fields as well as the Payroll Export Name and click Save.
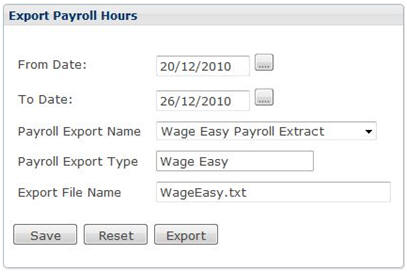
Click on Export.
Payroll Export Examples
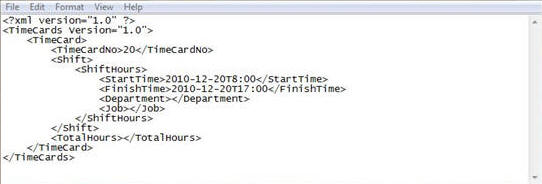
This is a basic guide to show how to setup the Payroll Exports for each respective export and what they should look like (Site Code found in the General tab and Payroll Codes found in the Export Options tab under Browse, Payroll Exports Menu)
Care
Setup Requirements
Site Codes: None
Payroll Codes: None
Export example
HR3
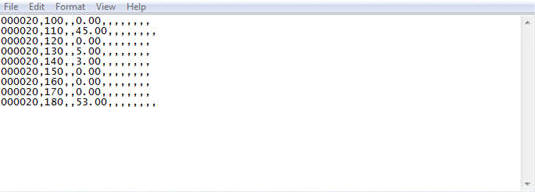
Setup Requirements
Site Codes:None
Payroll Codes:Yes (e.g. 100, 110, 120, 130, etc.)
Export example
Pastel
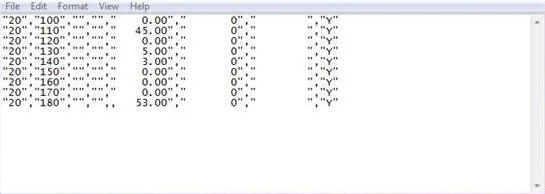
Setup Requirements
Site Codes:None
Payroll Codes:Yes (e.g. 5123, 5124, etc.)
Export example
Smoothpay Gold
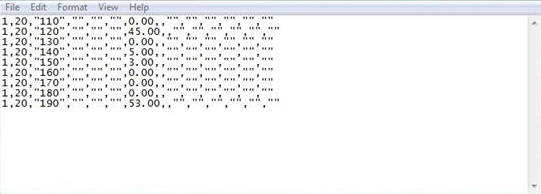
Setup Requirements
Site Codes:None
Payroll Codes:Yes (e.g. 100, 110, 120, 130, etc.)
Export example
VIP
Setup Requirements
Site Codes:None
Payroll Codes:Yes (e.g. 100, 110, 120, 130, etc.)
Export example
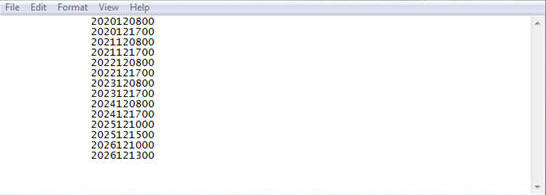
Wage Easy
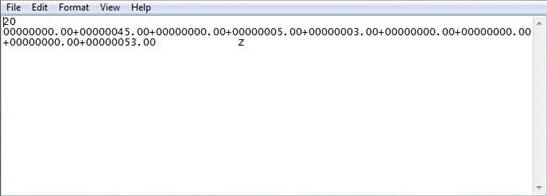
Setup Requirements
Site Codes:None
Payroll Codes:None
Export example
NOTE
Any employee who has not been assigned a Payroll Type will automatically be added to ALL payroll Extracts. To prevent this from happening a Payroll Extract called “none” must be created. It is selected by default when adding new Payroll Export Types in the drop down box. You will now have the option to select this for employees.
